You are currently browsing the category archive for the ‘Uncategorized’ category.
Seed sewing
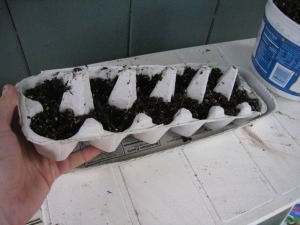
A couple of weeks ago I planted a few seeds to motivate me to put my trash-free compost to use and finally do some gardening. I used a couple of egg cartons that I saved last year, filling each egg dimple with some potting mix left over from a from an indoor plant that didn’t make it past Christmas. The tops of the egg cartons made perfect trays.
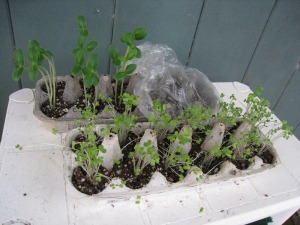
I planted a few different seeds according to their directions and in just two days my salad mix and cucumber plants sprouted.
I knew that these little plants wouldn’t last very long in their egg-sized homes so I prepared materials for their new, more luxurious abodes.
Preparing Potting Soil
Since I was going to be growing things in containers, the soil needed to be extra special – able to absorb water and hold nutrients, but drain well, too. According to what I read online, using pure compost was not advisable. Digging up soil from the ground would also not work. Even mixing my compost with dirt from my yard would not work well in a container and it would be incredibly heavy.
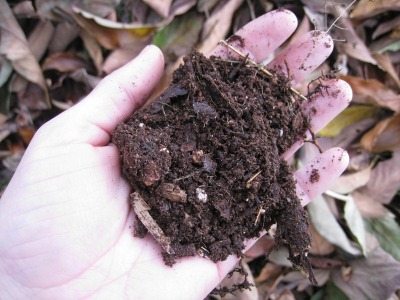
I didn’t want to buy potting soil from the store due to the packaging involved and its huge carbon footprint, so I looked into making my own potting soil. Most of the “how to make your own potting soil” websites claimed, however, that I needed things like builders sand, perlite and peat moss – all exotic items that came in packaging that I would have to buy at the store anyway. I finally came across a Mother Earth News article that shared my belief in using local ingredients for potting soil and suggested a mix of compost and leaf mold. “Leaf mold,” I found out, is basically compost made of just leaves.
I am lucky to live on a property with a beautiful, lush backyard and a Kukui nut and avocado tree. I didn’t realize how lucky I was until I started searching the grounds for this leaf mold substance I read about on the internet. Our Kukui nut tree and avocado tree both shed their leaves pretty regularly year round. “We must have this secret potting soil ingredient somewhere around here!” I thought. I searched around looking for old piles of leaves when I remembered that we do have a pile of leaves – a really large pile in the corner of the yard put there by the gardeners that visit a couple of times a month. It has been there ever since I moved in to this house about four years ago. I excitedly dug under this old pile of leaves to find gold! I mean leaf mold!
I didn’t have a shovel or gardening tools, but I was so excited that I dug out the precious potting soil ingredient with my bare hands and a plastic bowl. After sifting out the larger, non-decomposed pieces I mixed it with my sifted compost I made last year in a 1:1 ratio, making enough to fill all my containers.
Salad Table
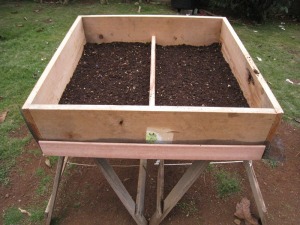
Since I eat so much salad, when I saw something online about the “salad table” I knew I wanted to make one. A salad table is a flat, wooden container that stands at the hight of your waist rather than on the ground. It is also wide enough to hold a variety of greens.
A salad table is really easy to make! And you can use all sorts of materials. This is the list of materials from the Maryland Cooperative Extension directions linked above:
- Untreated Framing Lumber (Two 2 X 4s, 10’ long, Two 2 X 4s, 12’ long)
-
3” galvanized wood screws
-
3/8” staples
-
Roofing nails
-
3’ X 5’ roll of 1/2” mesh hardware cloth (This is a galvanized wire mesh that comes in a roll.)
-
3’ X 5’ roll of aluminum window screening
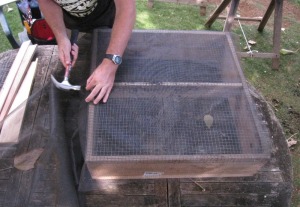
Rather than using new materials to build the table, my boyfriend, Adam, and I built it from materials that I have been collecting over the last couple years: part of a shipping crate I found at work, a screen from an old sliding door that was broken by a Fernando (my dog) incident, left over 1/2 inch hardware cloth from past random projects, and two wooden saw horses I found on the road waiting for bulk pick up. The only new materials we used were nails and scrap wood from the local hardware store.
I filled the finished salad table with 3″ of my home-made potting soil.
I transferred the seedlings from their egg carton starter homes to their new containers by simply pealing bag the damp paper egg carton. The egg carton pieces will be shredded and thrown into my compost.
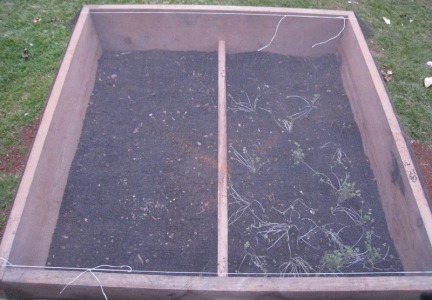
I put the salad mixture seedlings in the salad table container and planted the rest of the seeds from the package. The new seeds sprouted in a couple of days.
To protect the new seedlings from the downpours common to the Windward side of the island, especially this time of the year, I covered it with some of the left-over screen material we used to make the salad table, tying it down with a few lengths of my old dental floss I have been saving.
Bucket and Bag Gardens
The salad table would not be an appropriate place to grow my cucumbers nor the tomato seedlings I received at the Kamehameha Sustainability Fair, so I filled my newly painted buckets I made at the Bucket Gardens in Hawaii workshop in Waimanalo with my new potting soil and made pretty homes for them, too.
With cucumber seedlings to spare, I used a couple of the many reusable shopping bags I have collected over the years for the remaining planters.
I am fairly new to container gardening and would love any suggestions on how to make my plants happy and ideas of how to reuse materials for gardening!
Trash-free year in the news!
Green Magazine Hawaii’s editor, Kevin Whitton, asked me to write an article about my trash-free year experience. You can find it here in their Jan-Mar E-zine issue under the title “Excess Baggage”: http://www.greenmagazinehawaii.com/ezine.html. A big mahalo to Kevin for supporting my somewhat crazy trash-free experiment.
Today is the last day of my trash-free year experiment. Here are some final totals…
Compost
In one year, as a result of throwing all my food waste (including uneaten food from work and meals at restaurants), and unrecyclable paper waste that I purchased (such as paper board boxes and egg cartons), I needed two garbage can compost containers. I started with one, but when that filled up, I left it to “cook” and started a new bin. After 366 days, I made enough compost to fill six medium-sized dog food bags and one styrofoam cooler,…
…filled a another trash can full of compost that is presently “cooking,” and started a new compost pile in my original can. One of the biggest lessons I learned this year is that composting is extremely easy! If you have a little patience and trust that the materials will break down, in four to six months you will have beautiful plant food.
Cost
I kept my receipts this year to see if I saved or spent more money on food as a result of trying to live a trash-free year. The plan was to save every receipt, but I may have missed a few. According to what I did save, this year I spent a total of $3,695 on food. This averages out to around $70 per week. Prior to this year, I spent between $40 and $100 per week on food, so it doesn’t seem like it cost any more to be a trash-free eater.
Trash
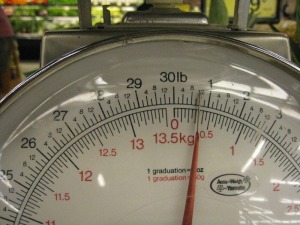
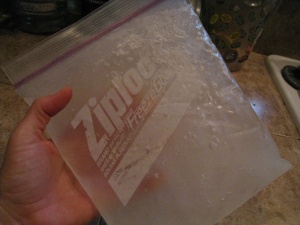
After one year, I ended up with a one-gallon Ziplock bag full of items that I could not put in my compost bin or recycle.
This bag weighs…
…around 3/4 lbs.
Trash Break Down
Medical and dental waste made up the bulk of my trash this year – primarily packaging for disposable contacts, birth control pills, and medicine. Miscellaneous plastic came in second with food and drink trash not far behind. The plan is still to turn this trash pile into a mosaic. I will hopefully have something to share within the first few weeks of the new year.
I still have the dental floss roll. I don’t consider it trash, because I am saving it to use as emergency string or for art projects. The most amazing thing about the floss I bought, is that one package lasted me 51 weeks – almost an entire year! And I am a regular flosser! Even if people are not interested in being trash-free – this floss is worth purchasing because it is a huge bargain considering how much is in one package.
Next steps
People keep asking me, “So, what are you doing to do when the year is over?” I learned this year that living a trash-free lifestyle, or as close to it as possible, is about being mindful of consumer choices and their resulting impacts on the earth. I also learned that it isn’t really that difficult to be mindful, once you get some routines and habits changed. I can’t see myself taking steps backwards. If anything, this is just the beginning. And I have a lot of people out there who have the same vision of a sustainable, trash-free world. Check out their links because they have done amazing work and have very cool blogs:
- The Clean Bin Project
- Gibsons Recycling
- Glenbrook Zero Waste
- Green Garbage Project
- My Zero Waste
- Rubbish Free Year
- Say No To Trash
- Subzero Waste: Waste Freedom in Iqaluit
- The 3 Peas
- The Rubbish Diet
- Trash Free Living
- We’re Not Trashy Report
- Zero Waste Home
Happy New Year! Here’s to many more trash-free years ahead!
Cheese Wheel Wax Candles
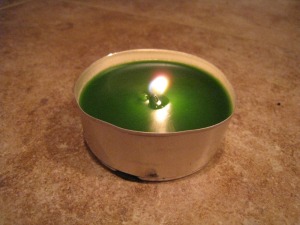
Answering my call for trash-free cheese, this past March my sister sent me a cheese wheel and cheese brick for my birthday. After eating the very delicious aged milk product, I wondered what to do with the wax it came in. Although some websites claim that cheese wheel wax can be composted, I thought it would be more fun and resourceful to see if I could make candles out it. So, I threw the wax in a couple of Ziplock bags and tossed them to the side for a trash-free project down the road. After a little searching last week, I found one bag of wax in the corner of our refrigerator produce drawer and another bag in our cupboard. My sister happened to be in town, so together we followed an instructional website for Cheese Wax Tea Lights and, mostly with ease, created candles from what remained from her birthday present to me.
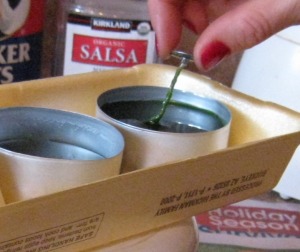
I acquired a handful of expired tea light containers from my best friend on a recent visit to the mainland so the only material I had to purchase for this project was the cotton string. Before melting the wax, my sister and I prepared these tea light containers and wicks by removing the wick holder, reopening the hole for the wick with a pliers, inserting a two-inch piece of cotton string through the hole and re-clamping the hole with the pliers.
We then put the green wax in a plastic ziplock bag and set it in boiling water to melt. Once it was melted, we poured it into the tea light containers.
To create a wick we dipped the cotton string three times into the melted wax. The wicks cooled quickly and we placed them into the soft candle wax before it cooled.
In the end we made six new candles, however, because the black wax was more difficult to work with, only four candles were worthy of a photograph.
I would not recommend melting the wax in a plastic bag. We lost a lot of the black wax because the plastic bag itself melted and leaked the wax into the water. Other options would be to either melt the wax in a tin can or float the tea lights containers on the water and melt the wax directly into them.
Dryer Lint Clay
Every week when I do laundry I feel guilty piling more and more dryer lint into our already over-flowing container dedicated to collecting the fuzzy left-overs. In my Week 30 : Reuse to Reduce post, I mentioned a couple of ideas I found for dealing with dryer lint – fire kindling and offering it to birds for their nests. Dryer lint does work well to start a fire, but unfortunately, my boyfriend and I don’t go camping enough to keep up with all the lint we produce. In the blog post I also shared my unsuccessful attempts of passing off my dryer lint trash burden to the local bird population. Despite these set backs, I think I may have found a solution to reducing my dryer lint footprint – dryer lint pottery!
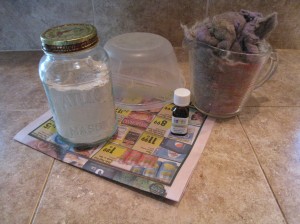
The basic dryer lint clay recipe calls for few ingredients – lint, water, flour and wintergreen oil. Since I had lemon oil I used it in place of the wintergreen oil, which I do not own. (This may have been a mistake, because my final pieces do not smell very pretty).
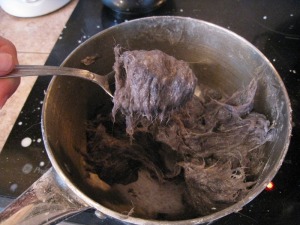
The first step is to add the water to the lint in a pot, completely saturating it. Then you slowly add flour, mixing it into the lint. As you can imagine, lint is not easy to mix. When I made a second batch of clay, I tore up the lint into small pieces before mixing it with the water and flour. This made mixing a lot easier.
After adding the few drops of oil, you need to spend a long time stirring the mixture under low heat until it all “combines.” When the flour and water and lint finally combine, the mixture will feel slightly slimy, soft and it will lose its clumpy shape.
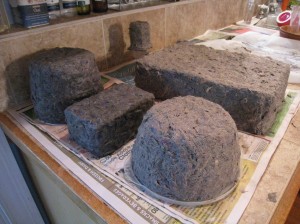
Since the lint mixture is extremely hot, the directions suggest laying it out on newspaper or parchment paper to cool before using. Once it is cool to the touch, you can take the clay and create various shapes using molds. I tried a variety of mold sizes and materials.
The directions say that it takes between three to five days for the clay to dry, which was just about accurate. As I eluded to earlier, the pieces began to smell a little sour. Once completely dry, the lint clay lost most of this scent.
Out of the entire batch, two pieces dried and came off their molds easily. I used a plastic Tupperware as a mold for the bowl and a mini-plastic wine bottle mold for the vase-looking piece.
Two pieces did not easily come off their molds. One mold was a Nancy’s yogurt container and the other a cardboard box.
And one piece actually grew mold! That one may end up in my compost.
I used six cups of dryer lint for this project, cutting my total lint accumulated thus far in half. Despite the few failed pieces, I plan to make more dryer lint pottery in the future – with the inclusion of the magical Wintergreen oil.
Toms Toothpaste Tubes
Toothpaste has been one of the most difficult things to continue to use without creating trash. Since I had stocked up on toothpaste at COSTCO prior to the start of my trash-free year I will not end up with many toothpaste tubes in my trash bag at the end of the year. I did, however, want to follow-up on a Tom’s aluminum toothpaste tube I mentioned in my Week 6: Pondering Packaging post. Since the tube is aluminium I wondered if it would be accepted at a recycling facility like aluminum cans and foil.
To prepare it for recycling, removed the one plastic part of the toothpaste tube using a pair of pliers.
I then unfolded the aluminum which easily opened up and washed out the remaining toothpaste.
I dropped the empty toothpaste tube onto the top of my bag of aluminum foil and took it to the recycling center. The recycling center staff took the tube with no questions asked. Success! Of course, this is a moot point for the longterm since Tom’s of Maine has stopped using aluminum toothpaste tubes. It is a reminder, however, that sometimes more things than we may think can be accepted for recycling.
Christmas
Americans are 25% more wasteful during the time period between Thanksgiving and Christmas. As a result, 1 million extra tons of trash is produced per week. I found that if you are mindful of packaging and gift wrap, however, you can reduce that extra waste to zero.
The Trash-Free Tree
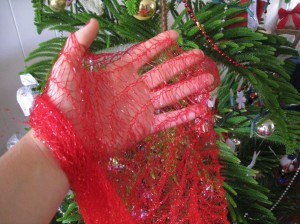
The first trash-free challenge was the Christmas tree. We bought our tree from Helemano Farms in Wahiawa last year. It is the only place on Oahu where you can get a freshly cut tree that hasn’t been shipped in from thousands of miles away – and the netting they use to bail your tree is biodegradable. We went back this year to get another one, however, after we picked our tree and it was sent through the baler, I noticed that the netting was not biodegradable this year – it was made out of plastic.
.
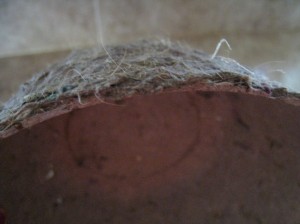
I did not throw the netting away or put it into my trash bag. Instead I set it aside for a future art or garden project. I am hoping to use my compost and try my hand at growing some vegetables in the New Year and the netting could be used as a trellise for peas or other climbing veggies. I also thought it might make good stuffing for a chair pillow. If anyone has other ideas of how I could reuse Christmas tree netting I would love to hear about them!
Another trash-free challenge arose when we started decorating the tree. The Christmas lights I borrowed from my parent’s stash finally died. We spent an hour trying to find the magic bulb that, if replaced, would bring the string back to life – but failed. We drove to Longs and bought boxes of new lights which luckily came with minimal packaging that we can use again to store the lights after the holidays. After the new, healthy lights were on the tree, a big question remained – what do I do with the old lights?
Technically, since I already had the lights prior to the start of my trash-free year experiment, I could have just thrown them in the trash. This was definitely the easiest option. Letting all the bulbs, wires and plastic go to waste, however, did not make any sense. After looking around on the web, I discovered a few recycling options. Home Depot has a Christmas Tree Light Recycling Drive each year. Unfortunately for my situation the drive happened weeks earlier in November. I also found two programs on the mainland that also take broken Christmas lights: HolidayLEDs and the Christmas Light Source. To minimize my carbon footprint I will hold on to the lights for one more year and look for the Home Depot tree light recycling campaign in 2012.
Trash-Free Gifts
This year I turned some of my would-be-trash into the following Christmas gift “treasures” and reusable wrapping:
- With the help of a drill, some glue, marine debris, and old (washed) dental floss, I turned Knudsen juice jar caps into gift tag/ornaments.
- I decorated some of the empty juice jars with old fabric and filled them with homemade granola and other treats. I made the gift tags out of a Starbucks gift bag I received at a party.
- I also decorated the lids of old spaghetti jars and filled them with homemade granola or popcorn. I found directions for these decorative lids on a Martha Stewart webpage.
How To Make Fabric Lids:
Materials:
– fabric or paper
– scissors
– a round object to draw a circle sightly larger than the lid (so that it will adhere to the outside and inside of the cap lip)
– glue
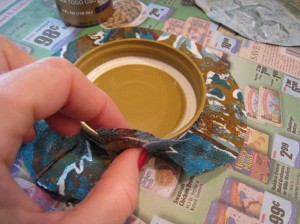
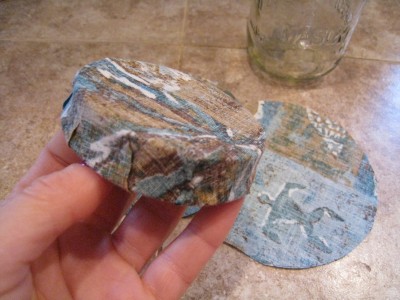
First cut out your fabric circle and spread glue on the entire outside of the jar lid. Place the lid in the center of the fabric circle. Martha’s directions call for using spray adhesive to do this, but a thin layer of Tacky Glue worked great. Once the lid is glued into place, snip a slit every inch around the fabric.
Spread a thin layer of glue on the outside edge of the circle so it will adhere to the inside of the jar lid.
Take a fabric slice and press it to the outside of the lid.
Fold the slice over the lip and attach it to the inside of the lid.
Repeat this with the other fabric slices. The slices will layer nicely over each other.
After the jar lid is completely dry you can put it on your jar to use at home or give away as a trash-free gift.
Trash-Free, Reusable Gift Wrap
Rather than wrapping gifts in newspaper and old magazines as I have done in previous years, I decided to try my hand at making reusable cloth gift bags. I don’t have much sewing experience but I discovered that there is a way to make cloth drawstring bags with minimal sewing skills by using old t-shirts.
I got the idea for the t-shirt gift bags from a video of Ame Guzman, who sits at a farmers market booth in Alameda California and makes grocery bags out of t-shirts as a part of the Pacific Coast Farmers’ Market Association Zero Waste Project. Her video has great step-by-step instructions for making the t-shirt bags. It inspired me to sift through my old t-shirts that I never wear and make a few of my own bags. The left-over t-shirt pieces can be made into great gift bags.
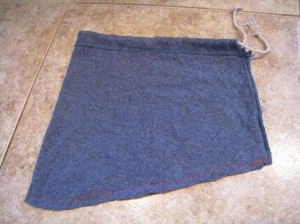
I made two larger gift bags out of the bottom half of a t-shirt (only one bag is show in the picture above). It was extremely easy!
After I cut the shirt, I folded it inside out and sewed along the open part of the material with my sewing machine.
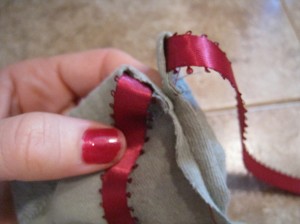
Then I used a safety-pin to thread a fabric ribbon through the t-shirt hem that was already there. I turned the resulting pouch right side out and had a simple, yet attractive, reusable cloth gift bag!
I made a smaller bag from the left-over sleeve of a t-shirt that I had already turned into a cloth bag.
I sewed the open part of the material and cut open the sleeve hem for the drawstring.
The bag didn’t close completely, but the dark material made it difficult to see anything inside. Next year I hope to sew or glue on simple Christmas shapes, like trees and stars, to make the bags a little more festive.
Making the cloth bags did take more time than using wrapping paper, but it was a really fun and fulfilling project. My hope is that each bag will take on a life and journey of its own as they are reused and passed on to others.
Halloween
Although Halloween isn’t really a holiday, it always feels like it is the kick-off to the holiday season, so I am including it in this post.
I made a couple of trash-free breakthroughs this past Halloween. After fretting for a couple of weeks about what to do about the whole Halloween giving-away-candy thing, my best friend passed on a great idea to me – give away pencils! It was the perfect trash-free solution! If you use a pencil up completely, until the last bit of lead almost touches the eraser, the left-over trash is minimal. Individual pencils aren’t packaged in trash like traditional Halloween sweet treats. And – everyone can use a pencil.
Despite their utilitarian value, giving out #2 pencils seemed a bit boring. In the hunt for more exotic pencils, I came across pencils made with recycled newspaper and even old blue jeans. The pencil that I knew would be the winner, however, was the one made out old money.
I bought the pencils made out of recycled U.S. currency from the GreenLine Paper Company. GreenLine has won environmental awards for their dedication to the sale of quality, environmentally friendly products. An added bonus, the pencils came in a recycled, and recyclable, paper package with no unnecessary, non-recyclable filler. Besides being a great trash-free purchase, the kids loved the pencils! One trick-or-treater even commented that he might be able to get extra credit in school for using the pencil.
Once October 31st had past, I needed to figure out what to do with our Jack-o-lanterns.
After sitting in our refrigerator for a few days, I decided to give these fellas a more exciting fate than the compost bin. I chopped them up and put them in the freezer with plans to turn them into a tasty dish later in the year. If anyone has any favorite recipes that call for fresh/uncanned pumpkin, I would love to hear about them!
Thanksgiving
Thanksgiving can be a fairly easy trash-free holiday, since there is great tradition in homemade cooking with fresh ingredients. I hosted a potluck-style Thanksgiving dinner this year at my house for family and friends. My boyfriend and I provided the salad, turkey, cranberry sauce, and gravy. Due to my trash-free pledge, Adam bought our plastic-wrapped turkey, and I purchased the rest of the ingredients. For future Thanksgivings I would like to look into finding packaging-free turkey options. If anyone knows about locations on Oahu that sell unpackaged turkeys, or turkeys in biodegradable packaging, I would love to know about them!
We served canned cranberry sauce since making it from scratch would require purchasing cranberries in plastic packaging. We supplemented our homemade gravy with canned gravy to avoid the powder mix which comes in non-recyclable, non-compostable packaging. I bought most of our salad ingredients as I always do – free of produce bags. Rather than using Manoa lettuce, I splurged for pre-packaged local Deans Greens and put the plastic bags aside for recycling.
Rather than doing a traditional turkey, we decided to get it cooked “kalua” style in an imu, or underground oven. A community program close to where live, the Key Project, cooks kalua turkeys as a fundraiser each year. Its a BYOB (Bring Your Own Bird) arrangement. You bring the bird and, for a small donation, they cook it in an enormous imu. There is a trash risk, however – you have to wrap the turkey in A LOT of foil.
Foil is not something that is included with the City’s mixed recyclable pick-up. Luckily, there are places on Oahu that will recycle foil and pay you for it. I plan to take my bag of cleaned, post-Thanksgiving turkey foil to Reynolds Recycling.
The finishing touch for our trash-free Thankgiving dinner, was using cloth napkins in place of paper towels and paper napkins.
I learned over the year to keep a basket of cloth napkins out to make them easily accessible for day-to-day usage.
After the meal was done and all the meat was pulled off the turkey, I used the remaining carcass to make turkey soup and threw the clean bones into the freezer for future re-use and recycling.
According to the website, Traditional Foods, the bones can be re-used a few times to make soup broth and added to dishes like beans and rice, for flavor. Once I have squeezed the juices out of them, I will throw them into my compost bin. I also froze the smaller pieces of turkey for taco filling, and a bag of scraps for my dog.
“Recycling Revelation” update
In my last post, “Recycling Revelation,” I wrote about finding new places to recycle more kinds of plastic, specifically #2 and #4 plastic bags. Stuart Coleman, the Hawaii Coordinator for Surfrider Foundation, mentioned in an email to me that this information was a bit misleading. He explained, “The plastics industry wants to say the solution to plastic pollution is recycling, yet less than 9% (some say 5%) of all plastic bags are ever recycled. Commercial recyclers actually hate plastic bags because they foul up their machines and say the bags themselves just aren’t worth recycling.” He also mentioned that the website I provided, www.plasticbagrecycling.org, is actually funded by the plastics industry and that they “often distort the truth to spread propaganda about their products and resist even the most common sense measures to reduce plastic pollution.”
Stuart also provided me a link to an interesting article he wrote for the Honolulu Weekly called “Plastic Fantastic Love.” One important point that the article makes it that although recycling plastic bags seems like a good solution, according to Stiv Wilson, a journalist and ocean activist who worked with the Surfrider Foundation to help pass bag bans in the Pacific Northwest, in actuality, “It takes 70 percent virgin plastic to create a new bag.” Stiv explains futher that “all we’re doing by plastic recycling is creating more, not less plastic in the world, while giving the average, good intentioned citizen the illusion of progress.”
Wow. I guess it is back to homemade tortillas.
Surfrider, along with a host of other organizations, are working on getting the Bag Bill, SB 1368, passed in 2012. If SB 1368 becomes law, it will reduce plastic pollution statewide. This is an important step in moving towards a trash-free or zero-waste culture in the islands. Contact Surfrider Foundation to learn how you can help with the Rise Above Plastics campaign and get this bill passed.
About 40 weeks ago I stepped into my local grocery store to see what I could buy after committing to a year of being trash-free. When I looked around, my heart sank. Other than the liberated produce section – all I saw was food and dried goods trapped in plastic packaging. Even the glass containers had wraps of “safety” plastic around their lids. So, I did what I had to do, I stopped buying a lot of things at the grocery store and at Costco. I said good-bye to tortillas, packaged bread, chips, cliff bars, boxes of cereal, Tasty Bites, Amy’s yummy frozen foods, packaged trail mix, bags of Ghirardelli chocolate squares, packaged cheese and deli meat, cottage cheese, yogurt, toilet paper in plastic wrap…
After I got the hang of living without these used-to-be staples in my life, it actually wasn’t that bad. I learned to enjoy only buying items fresh or in bulk, and making things from scratch, like granola bars and corn tortillas. I felt good that I could compost the wrapper that covers my toilet paper and know which stores sell fresh, non-packaged bread. I learned to take pride in living a “simpler,” plastic packaging-free life and all the challenges that came with it.
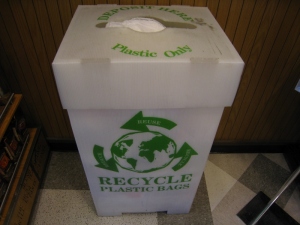
Then a couple of weeks ago, I walked into Times Supermarket in Kaneohe and I saw something that could make my trash-free experiment a little less challenging – a plastic bag recycling container that accepted a lot more than just grocery bags.
Most stores have a place where you can recycle your grocery bags. The Safeway in Kailua has one, and so does the Foodland.
But these other containers have no specific directions that define exactly what kinds of plastic bags you can put in the containers, so I have always assumed that they only accept single use grocery bags and maybe produce bags. This plastic bag container at Times was different. It said I could recycle a lot more than just grocery bags.
It wasn’t shocking that “retail” and “drug store” bags were on the list. And I have been dumping newspaper bags in the Safeway plastic bag recycling containers for a while now. However, if I ever dry-clean any clothes, it is good to know that I can recycle the plastic in this container. The biggest news? These bins accept ALL CLEAN bags labeled #2 and #4! I immediately went into Times to see what I could safely add to a trash-free shopping list. I didn’t find any #2 plastic bags, but I found these #4’s:
With this new recycling revelation and my photographic proof, I bought the bag of corn tortillas (I had been craving them and too lazy to make them from scratch) and left. I went home and visited the www.plasticbagrecycling.org site from the recycling container sign. There I found an even longer list of materials accepted in this magic plastic recycling bin:
- newspaper bags
- dry cleaning bags
- bread bags
- produce bags
- toilet paper, napkin, and paper towel wraps
- furniture wrap
- electronic wrap
- plastic retail bags (hard plastic and string handles removed)
- grocery bag
- plastic food storage bags (clean and dry) – (e.g. Ziploc® Bags)
- plastic cereal box liners (if it tears like paper do not include)
- Tyvek(no glue, labels, other material)
- diaper wrap (packaging)
- plastic shipping envelopes (no bubble wrap/remove labels)
- case wrap (e.g., snacks, water bottles)
- All clean, dry bags labeled #2 or #4
The website includes an option to put in a zip code to find out where these recycling containers are in your neighborhood. It also mentions to call the store to verify acceptable materials before visiting the drop-off location, however, after the experience I explain below, I am not sure how helpful such a phone call will be.
According to the list, JCPenny, Safeway, Wal-Mart, and Lowes are considered drop-off locations in Hawaii for this organization (where was Times?). I called my local Safeway to see if I could put this list of plastics in their recycling bin and the people I talked to had no idea. When I called their corporate office, the lucky woman who answered my phone call could not tell me what plastic items were acceptable in their Hawaii Safeway recycling bins, and recommended that I “just stick with grocery bags.” The folks at the Wal-Mart said, “sure,” without thinking twice, and I have yet to contact JCPenny or Lowes. For now, I will stick with Times in Kaneohe.
Despite this wonderful discovery, I have to wonder, is it a good thing that I can now purchase more things wrapped in plastic because I can recycle the packaging? It will certainly make my life easier, and cheaper, if I can buy cereal and toilet paper at Costco again, and a loaf of bread at the supermarket. On the other hand, if we want to get rid of single-use plastic bags, which I do support, promoting recycling of such material may weaken the argument that it needs to be banned. And of course, there is all the recent research on plastics and what it may be doing to our health.
I think I will stick with the good `ole, blue triangle school of thought: reduce and reuse as much as possible first, then recycle as the last option. And for doing such a good job, treat myself to a nice, warm corn tortilla.
I recently returned from a three-week vacation and my first experience in trash-free traveling. Although it was frustrating at times along the way, my pre-planning and touring fairly “green” places ended up paying off. Overall taking the trash-free lifestyle on the road wasn’t that difficult. And I actually returned to Hawaii with a few new items to make the trash-free lifestyle a little bit easier.
Essential Trash-free Traveling Items:
Because they are trash-free essentials at home, I also brought napkins and Snack Saks on the trip.
I only brought five napkins, but they were really easy to wash along the way.
I also threw a collapsible cup (X-Mug) in my carry-on for plane ride beverage rations. (I carry a water bottle, but sometimes it is nice to have a ginger ale when at 30,000 feet).
Although I felt good about using my cup, I noticed the attendants separating out the regular plastic drink cups when they collected trash from passengers. Although I didn’t know it at the time, Alaska Airlines actually has a great in-flight recycling program, and do recycle the beverage cups when they have a participating airport that will take them. I guess the X-Mug wasn’t completely necessary, but whenever possible, reusing is always better than recycling.
Planning for Snacks:
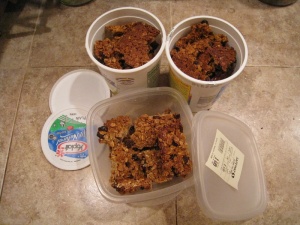
Traveling involves a lot of wandering around in new territory where you may not know where you can get a trash-free, non-packaged snack. I need to eat snacks throughout the day, so rather than get stressed out and waste time looking for these spots on my trip, I made snacks at home to take with me. I thought about packing a bag of nuts and raisins, but decided that they would be too heavy to cart around. Instead I chose to use a great granola bar recipe given to me by a friend a while back (thanks, Katie!). I made two batches before I left, packed them in three plastic containers, and put them in my carry-on backpack. A small Snack Sak filled with these granola nuggets would last me an entire day.
The granola bars were hearty but lightweight, and were made of ingredients that did not need to be refrigerated (primarily peanut butter, oil, oats, oat flour, honey and raisins). They lasted two of the three weeks which worked out perfectly because by the time we were out of granola bars, we were in a big city, Seattle, where bulk food snack items were a plenty. The newly empty containers also proved to be great for storing compost.
Here is the recipe:
Granola Bars from “Running Times”
makes 1 9×13″ pan, or about 18 bars
Ingredients:
3 cups rolled oats
1 cup grated coconut
1/4 cup wheat germ or oat bran or rice bran or okara
1/4 cup butter or margarine (I substituted oil for butter)
1/4 cup brown sugar
1/2 cup honey or barley malt (for slightly less sweet bars)
1/2 cup natural peanut butter
1 cup extras (raisins, flax seeds, sesame seeds, sunflower seeds, nuts, puffed rice, etc.)
Preheat oven to 325.
Combine oats, coconut, wheat germ and any nuts or seeds you wish to toast for the bars in a 9×13″ pan. Toast for 25 minutes. Remove pan and turn oven up to 350.
While the oats toast, combine butter, sugar & honey in a small saucepan. Cook over medium heat, stirring occasionally, until the butter is melted and sugar dissolved. Add the peanut butter at this time and stir in thoroughly.
Dump the toasted oat mixture into a large mixing bowl. Add any additional extras. Drizzle the syrup over oats and stir until they are all evenly coated. Return everything to the 9×13″ cake pan and press mixture in to form an even, solid mass.
Bake at 350 for 12 minutes (4-6 minutes longer if you like crisper bars). Remove pan to cooling rack and let cool completely before cutting. Bars will keep for well over a week in a plastic storage container, or freeze for later use.
Where to put the waste?
I did accumulate recyclable and compostable materials throughout my trip…and a little bit of trash. I was lucky that one of our stops was the very green city of Seattle where I found a food court near our hotel (Marion Court, 823 3rd Ave.) with a complete recycling/compost station.
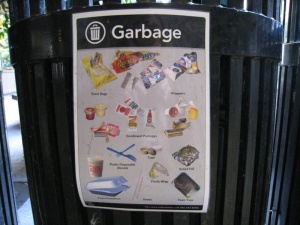
Each bin was labeled and included very detailed signs with good examples of what to put into each bin.
After two and a half weeks of traveling without throwing anything away, this place was a fabulous find.
My last hurdle, however, was dealing with post-car camping recycling and compost waste from the final leg of our trip, camping at Mt. Rainier. Whole foods and the many markets of Pike’s Place allowed us to get ingredients for meals that were not pre-packaged, which prevented a lot of trash. I even found a mini cheese wheel I used for sandwiches.
The cheese guy at the store would not put the cheese in my own container due to health codes. After a lot of convincing, however, he finally gave it to me in an unbleached paper bag usually used for bagels.
I bought a lot of non-packaged perishable items like fresh corn, cherries, and other staple vegetables for the camping trip knowing that I would be accountable for any compost waste. I did this assuming that if I found one compost station in Washington, it would be easy to find another. This was not the case, however. There were no compost stations at the campground (probably for good wildlife reasons) nor at Whittaker’s Bunkhouse where we stayed our last night of the trip. And as we were driving to the airport, I was having my doubts that I would find a place to dump the corn husks, left over cherries and vegetable scraps at the airport. So, we pulled over and dumped this food waste in some bushes off a country road somewhere. This was probably illegal, but technically it was better that the greens, all locally grown in the state of Washington, went back to the earth than sit and rot in a landfill. (Sorry, no photos of the drop off. It was somewhat of a rushed affair.)
Luckily the Seatac airport has a place to recycle the other stuff we had been carting around for a while: paper, cans, and bottles.
Trash:
I did end up with a small bag of trash at the end of the trip.
The bag tags from our luggage were unavoidable. Hopefully someday the airline industry will create something digital that can be reused to replace these. I also got hit with another straw at a restaurant, drank a few beverages, changed my contacts, and bought some smoked salmon. The last item was definitely a splurge and a knowingly non-trash-free item since I knew from experience with the cheese wheel that this Whole Foods would not let me use my own container to package the salmon. However, being in the Pacific Northwest, smoked salmon is really hard to pass up. When I got home, I did my best to minimize the “trashiness” of this item by soaking it in water and separating the plastic from the paper, so I could at least put the paper part into my compost.
Trash-free Loss:
On a sad note, I lost one of my favorite trash-free tools during my recent travels. I was using my “To Go Wear” bamboo chopsticks at a busy New York Chinese restaurant known for its soup dumplings. It is a famous spot, so the place was packed and busy. After finishing my four or so dumplings, and servings of Chinese broccoli, string beans and chicken, I placed my chopsticks on my plate. The waitstaff cleaned up our table so quickly that I didn’t realize until it was too late that my chopsticks had also been swept away, lost forever to the trash. My friend asked the waiter about my precious sticks and he looked at her as if she was crazy. There would be no searching through the trash for chopsticks.
Trash-free Gains:
On a brighter note, I came home with a few new trash-free tools. The first item was left for me in our hotel room – a shower cap.
When I was growing up, my best friend’s mom, Kate, used shower caps, instead of Saran wrap, to cover open containers in the refrigerator. She was a resourceful woman ahead of her times. Since I started my trash-free experiment I have been looking for shower caps so I could do the same, but if you buy them at the store, they usually come in plastic. This shower cap came in a paper box that I recycled in Seattle. Because it has elastic, it can be used for various sized containers.
I found another trash-free tool at a store called “Fireworks” in Seattle: the “Eco Staple Free Stapler” from Made by Humans.
Rather than using metal to bind paper together, this stapler magically threads pieces of paper into themselves.
Finally, the third trash-free tool I found was something that I had previously heard about, but never looked into: toothpaste tablets.
This product is created by the company “Lush.” Their Toothy Tabs fit perfectly with the trash-free lifestyle. There is no plastic tube and you can easily recycle the Toothy Tabs paper container. I tried one of the tablets, however, and it didn’t taste very good or leave my mouth feeling minty-fresh. Also, Toothy Tabs are not made with fluoride, which is a controversial chemical, but has proven to prevent cavities. So, I am still not certain that I am going to make the switch. If there are any other similar products out there like Toothy Tabs that taste better and do contain fluoride, I would love to hear about them!
Compost Update:
What happens when you leave your compost for three weeks without tending to it?
In Hawaii you may find a sweet potato plant or Kukui nut tree taking root. Besides hosting these new plants, the material in my original trash can compost bin actually shrunk a half a foot while I was gone, and no longer has worms. Perhaps it is time to harvest the rich soil and plant something…
I have realized over the last seven months that eliminating one’s trash has a lot to do with being able to creatively reuse materials. Of course, even in our American “throw-away” culture, certain consumer packaging items are commonly offered alternative lives before being tossed in the trash. Everyone knows that plastic yogurt and hummus containers make great tupperware; and with a little effort, old wine corks can be assembled into a stylish bulletin board or drink coasters.
Here are a few more would-be trash items that I have found uses for. I would love to hear ideas of how others are reusing or “upcycling” materials.
Dog food bags:
I have not been able to find bulk dog food on my island, and dog food bags cannot be recycled or composted because there is a layer of plastic lining on the inside of each bag. I looked into making my own dog food, but it sounds like a pretty big time commitment. So, I continue to purchase dry dog food from the store. It happens that dog food bags make excellent containers for dry or brown compost materials.
When I start harvesting my finished compost, I will be able to store it in these bags as well.
Dryer lint:
You can put dryer lint into your compost, but only if it is composed of natural fibers. Rather than worry about the composition of my clothing, I have tried a couple suggestions from folks online for reusing dryer lint.
Suggestion 1: Dryer lint = kindling. The last time I went camping with my boyfriend, we brought some lint to use for starting the campfire. Dryer lint happens to be very flammable and was a very successful fire starter – even with the flint and steel.
Suggestion 2: Dryer lint = Great bird nest material. Something I have yet to be successful with, however, is encouraging our local bird population to use my dryer lint for their nests. I have tried placing our box of lint in a few places, including in a tree that I see birds frequent everyday, but there have been no takers.
I even tried to make it a bit more natural and placed some directly on the tree.
That technique did not work either. If anyone has tried this and has been successful – I would love some tips.
Ziplock bags:
I don’t need to explain the many ways to use and reuse Ziplock bags. Currently my stash of Ziplock bags have become essential to helping sooth a former shoulder injury during this summer’s swimming season. Since my gel pack ripped last year, I have been using Ziplock bags with crushed ice – ultimately wasting a lot of ice and water. A roommate clued me into the fact that you can make your own reusable gel-like ice packs using Ziplock bags, water and alcohol (thanks Cori!). I found a recipe online, tried it out, and it worked! After about four hours in the freezer, I had homemade ice packs that were flexible like the gel packs you buy at the store. This is one of several recipes that I found on the Tipnut website:
Reusable gel type ice packs:
2 cups water
1/3 cup vodka (80 proof)
Food coloring (any color you like)
Ziploc Freezer Bag
Pour liquids into ziploc freezer bag, add food coloring (you’ll know at a glance that it’s your ice pack and not something to consume) and freeze. Makes a nice gel type icepack.
When taking ice packs from freezer to use, wrap in towel first before applying to body. If ice packs freeze too hard and aren’t slushy, simply allow the ice to melt in bag then add more alcohol.
Other “reuse to reduce” ideas:
Zero waste conference: Large gatherings, such as conferences, are notorious for generating lots of waste. Besides the disposable coffee cups and eating ware, participants are many times given things that they rarely use after the conference, like bags and name tags. A colleague in my office is working on a zero-waste plan for an upcoming conference which includes gathering name tag lanyards to reuse and give out to participants.
Tea leaf strainers: I have finally bought a tea ball and a tea strainer at a kitchen store that I can reuse again and again with loose leaf tea. The bulk loose leaf tea was more difficult to find, but they sell some nice varieties at “Down To Earth” in Kailua in the bulk spice section. I even found a couple chai spiced varieties.
Re-use building materials: It seems a shame that the materials of a house or other building just go to waste after it is demolished. Not only is a lot of trash produced, but a lot of resources wasted as well. Since 2007, however, Re-use Hawaii has been offering a green alternative to demolition: deconstruction. According to their website, Re-use Hawaii has performed over 100 deconstruction projects and has kept over 1000 tons of material from entering the landfill on Oahu. They stock a wide variety of items and even suggestions for how to reuse some of the items. Check out what they have in stock at their warehouse.
Anyone have experiences reusing materials that most people dump in the trash? I would love to hear about them!
The big news for this post is that it has officially been six months since I started my trash-free lifestyle experiment. I was hoping to come up with something meaningful and deep to say about what I have learned, but nothing ever came to me. Instead I will share the coolest part, a frustrating part, and something that inspires me to continue to believe in a world without trash.
First, however, a six-month trash update:
My trash has increased since the last time I sorted through its contents at Week 15, mainly in the medical and dental category. My miscellaneous plastic also increased because I ordered a new piece of clothing online which came in plastic packaging, and bought glass food containers which were wrapped in thin plastic.
How much does six-months of trash weigh?
This is the trash I originally labeled in one of my first posts as”Trash I Need To Figure Out What To Do With.” The long term plan has always been to upcycle the contents of this bag into some kind of art piece or pieces. I am still brainstorming this idea and process in my head. I would love to make a mosaic, however, if anyone has any other ideas (now that you have seen all my trash!) I would love to hear about them.
I have also been separating my trash into another category I named, “Definitely Biodegradable.” I ripped and tore-up some of that trash over the last six months, adding it to my trash can compost bin. Most of it, however, ended up in this 56 Qt container and has been sitting there for, well, about six months.
I discovered that ripping up each box, egg carton, and food wrapper doesn’t take too much time, however it takes enough time that it is easy to put off. Enter the hand-me-down shredder.
I am not sure how much the shredder I used, the Fellowes Powershred PS 60CC, cost when it was purchased years ago, but it did a fabulous job and tore apart everything in the bin, including a thick cardboard laundry detergent box, toilet paper rolls, and egg cartons (after I broke them apart a bit), and took me less than 30 minutes to complete. A shredder is a great tool to have when using compost as a way to deal with some of your trash.
Speaking of compost, the coolest part about my trash-free experiment so far has actually been the opportunity to see a lot of my waste “magically” turn into soil. A couple weeks back I started a new trash can compost bin, because my original bin was pretty full and nicely turning into soil.
I mentioned in a recent post that I had found worms in my compost bin – worms that I never put there to begin with. Digging through my compost bin recently, I discovered that these worms had multiplied. I took a video to show how worms have turned my compost bin into their new home (note: the pieces of shiny, bluish material in the bin are pieces of the two “Compostable” Sun Chip bags that I cut up and put in the bin months ago but never decomposed).
After researching a bit on on the internet I learned that my worms are not technically “composting worms” or “Red wigglers” since I am also finding them deeper in the compost. Red wigglers like to live only at the surface, right underneath decomposing matter and manure. However, I also discovered that other worms that often find their way to compost piles – and my bin – do provide a similar benefit to a compost pile as the red wigglers, eating the decomposing matter and creating worm poop, or vermicastings. They just don’t do it as fast and, like the various decomposers that help break down material in a compost bin or pile, they will visit a pile or bin when it is the right time. I did not see the worms when my compost bin was new, because it was probably too hot. Working with my new bin, I am reminded that in the beginning, the compost mix can be slimy, smelly, and filled with lots of insects and bugs.
But with a little time and patience, compost magic will happen and even the worms will stop by to help.
A frustrating part about my trash-free experiment has been the inability to find bulk toilet paper not wrapped in plastic. I have gotten around this by purchasing individually wrapped rolls at Longs, but they cost close to $2.00 each. If I wanted to buy this same brand, which claims itself to be eco-friendly, in bulk, the rolls would be wrapped together in plastic. I still need to do more research to find out where large companies and office buildings purchase their TP, because I have a feeling their rolls probably come in large cardboard boxes, with no extra plastic wrapping the rolls. Why we, the individual consumer, don’t have that choice, is quite frustrating to me.
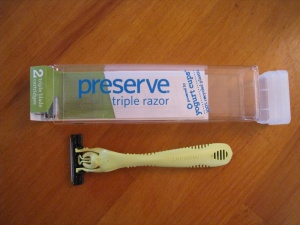
It seems that a lot of my frustration with trying to be trash-free actually always involves plastic. Plastic is so infiltrated into our western, consumer world, that it seems like it will never go away, and never allowing us the chance to live trash-free and more sustainable with the earth. That is why when I see companies like Preserve, I am inspired to continue to believe in a world without trash. My first introduction to this company was when I purchased one of their toothbrushes. A couple weeks ago I purchased one of their razors.
Like the toothbrush, the razor body is also made out of recycled yogurt cups (the blades are replaceable). The packaging it comes in is actually a carrying case made with post-consumer recycled PET #1. And inside, directions (printed on 100% post-consumer recycled paper), explain how you can put the razor back into the recycling stream yet again by sending it back to the company or by dropping it off at a “Preserve Gimme 5” station at various Whole Foods stores. Currently Hawaii is not on the list of participating states in this program, but perhaps with a little pressure, the Whole Foods here will also get on board. I just became a friend of Whole Foods Kahala on Facebook and sent them a request to add this recycling program to their stores. Crossing my fingers…
After the first couple months of this experiment, I naively thought that my new trash-free diet, which has forced me to pretty much eliminate packaged and processed foods from my meals, would somehow boost my immune system so much that I would get through the entire year without catching a single cold. I was doing pretty well until the day after we went on the “Tour de Trash,” when my theory was proven wrong and I caught a nasty bug that lasted for two weeks. Although I was miserable, catching the cold did offer me the chance to see if it is possible to treat the side-effects of a cold without creating any trash.
The first few days of the cold I just had a sore throat. This was fairly easy to deal with. A great friend of mine once taught me how wonderful hot water mixed with honey, lemon juice, and the squeezed lemon wedges feels on your throat. I made one of these concoctions for the drive into work and packed my honey jar (an old spaghetti sauce jar filled with bulk honey) and extra lemons to make refills at the office as needed. The used lemons got tossed in my compost and the bulk honey didn’t come in any packaging. So far, so good.
When a cough kicked in, things got a bit more challenging. I needed cough drops. I searched online for recipes for home-made cough drops with honey. The first recipe I tried came out more like taffy than a hard lozenge. I had never made candy before and I discovered that exactly when you take the melted mixture off the stove is critical. With this experience under my belt, I tried again, choosing a different recipe for pure honey cough drops.
The recipe calls for 1/2 cup of honey, but I also added the juice from one lemon and a couple teaspoons of ginger powder once the mixture was boiling and almost ready to be made into drops.
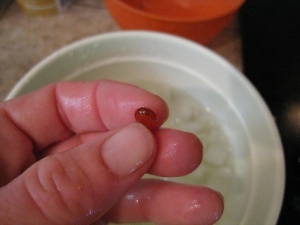
Boiling the honey at the correct temperature is key. The recipe calls for the temperature to reach between 300 to 310 degrees Fahrenheit. A candy thermometer would have been really handy, but I found out that you can also check at what point along the spectrum of candy hardness a mixture is (is it going to be taffy or a hard candy?) by dropping some of it into cold water.

Dropping some of the mixture into cold water will tell you if it has reached the consistency for hard candy
The drop shouldn’t dissolve when it hits the water, rather it should form a hard ball.
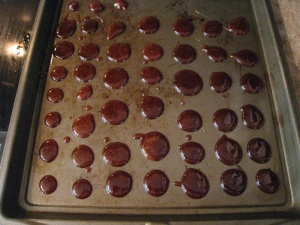
After the mixture passed this cold water test, I quickly made honey drops on a greased cookie sheet.
I had to do this rather quickly, before the mixture cooled in the pot. In the end, just a 1/2 cup of honey made quite a few cough drops. I nearly filled an entire cookie sheet.
When the drops cooled, I put them into a glass jar, dusting each piece with flour to keep them from sticking to each other. Unfortunately, despite the cold water test result, the cough drops would still melt into more of a taffy consistency unless they were refrigerated. When I realized this I was far into my cold, and lacked anymore energy to try again. I think the problem may have been the humid climate here in Hawaii, but I am not sure. If anyone has tips for making candy and/or cough drops, please send them along!
Even though I needed to keep the cough drops in the refrigerator, they were effective at abating my cough for a few days. When the cough got stronger, however, my boyfriend (who also got sick at the same time) gifted me a bag of his Ricola cough drops that he had purchased. The bag and wrappers for those cough drops cannot be thrown into my compost or recycled. Since my trash-free rules do allow gifts that include trash, I don’t technically need to count the Ricola trash – however I put a few wrappers in my trash bag anyway as a reminder.
So – is it possible to catch a cold and not the trash that comes with it? This experience taught me that it might be possible, if you are prepared. The last thing you want to do when you are sick is to be searching online for trash-free cough drops or trying multiple times to make effective drops from scratch. If anyone has any good homemade remedies for treating the symptoms of the common cold that I can add to my tool kit, I would love to hear about them!
Compost update:
My trash can compost bin is doing well – full of worms and biodegrading matter. However, after being packed with material for five months, the container is bulging at the sides and compost is escaping through its holes. I could sift through the cooking heap and harvest the good stuff to make room. However, I would probably lose some worms in this process so I will instead put it aside and start a new bin that will hopefully take me through the end of the year.
Upcycled Material Pop-Quiz:
A woman who works in my building came to work with this necklace on and I was instantly drawn to it. Can you figure out what she made the flower out of?
I was so surprised when she told me that she cut the pendant out of a gift card from a bookstore where she used to work. “We threw so many used gift cards away,” she explained. What a great idea! I will never look at a gift card the same way again. I wonder what other cool things could be made out of them…

